LIFTED SUBARUS

Curated Offroad Subaru Build Guides

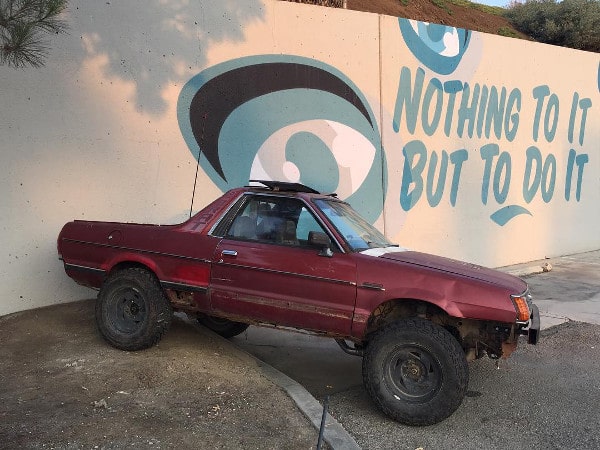
In 2017 I bought my first Subaru: a worn-out $440 1987 Subaru DL wagon for the OG Oregon Gambler 500. Two weeks later photobucket broke the internet, and most of the threads I was relying on to modify the car.

My goal is not to replace USMB, NASIOC, or any other messaging board, but to self host as much content as possible to ensure it doesn't go away again in the future.

This is where you come in. Working on a write-up? Awesome. Post it to your favorite messaging board, and send me it. Lets make sure these writeups don't disappear in the future. Don't own content and just want me to link to it here? cool. Email me your list of your favorite build threads. The focus is on subaru builds, but generic build info like bumpers, tire carriers, fender folding techniques are all welcome.


Stay Muddy Friends,

-Doug
lifted subaru 4x4

Radius Rod Extension

— L-series

by Alex Bui

This is a simple modification to do to help gain clearance for bigger tires and improve castor. Doing this mod will push your front tires forward how many inches you extend the radius rods. The average extension is 1 - 1.5 inches, but I have found 1.5 inches a little too much.


What You'll Need

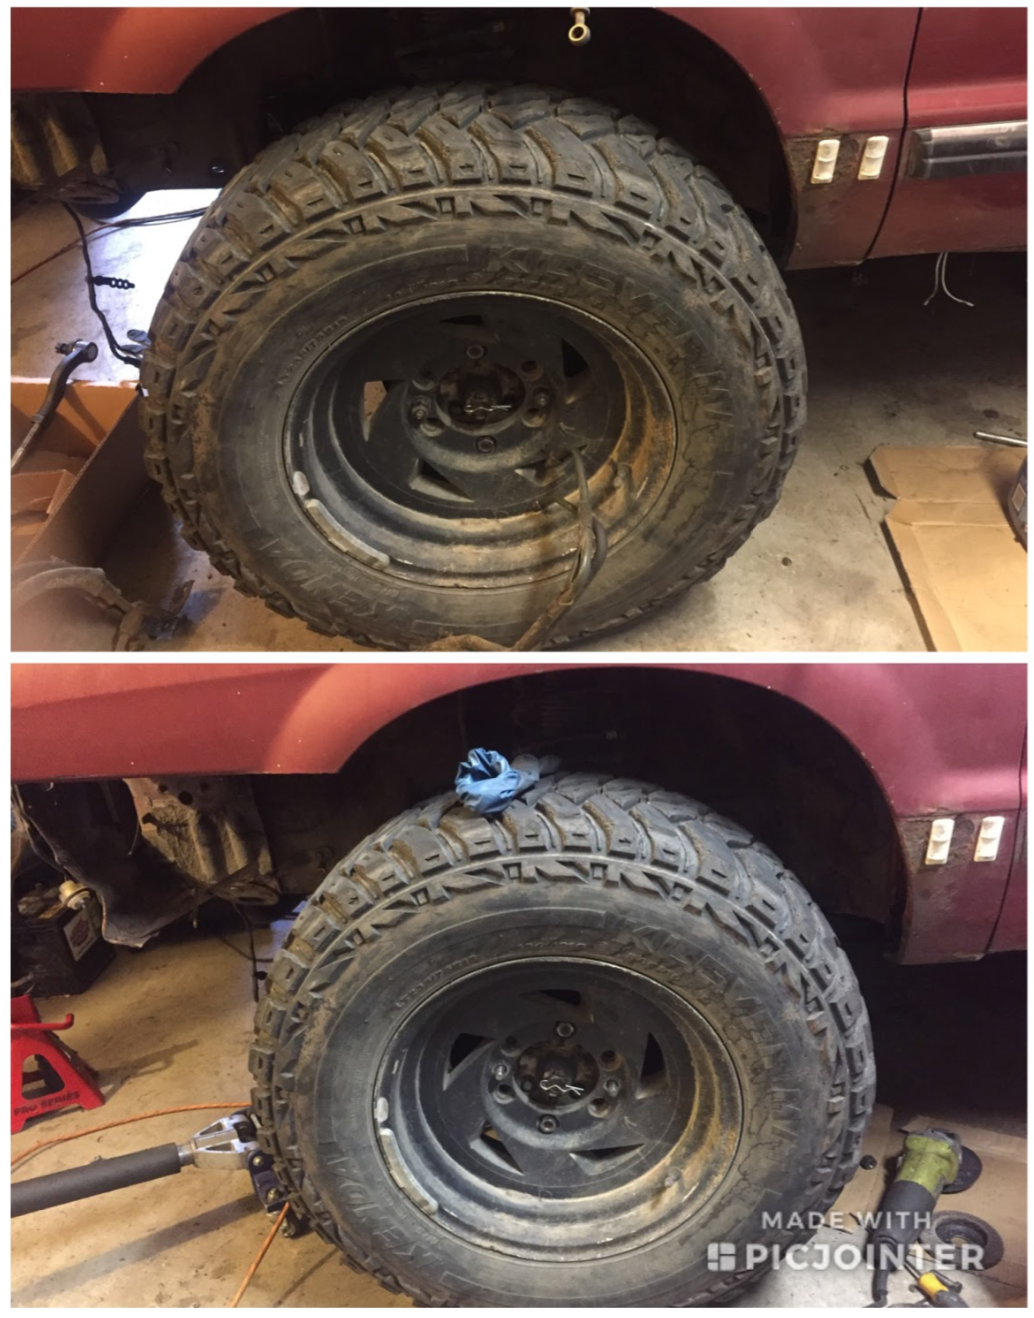
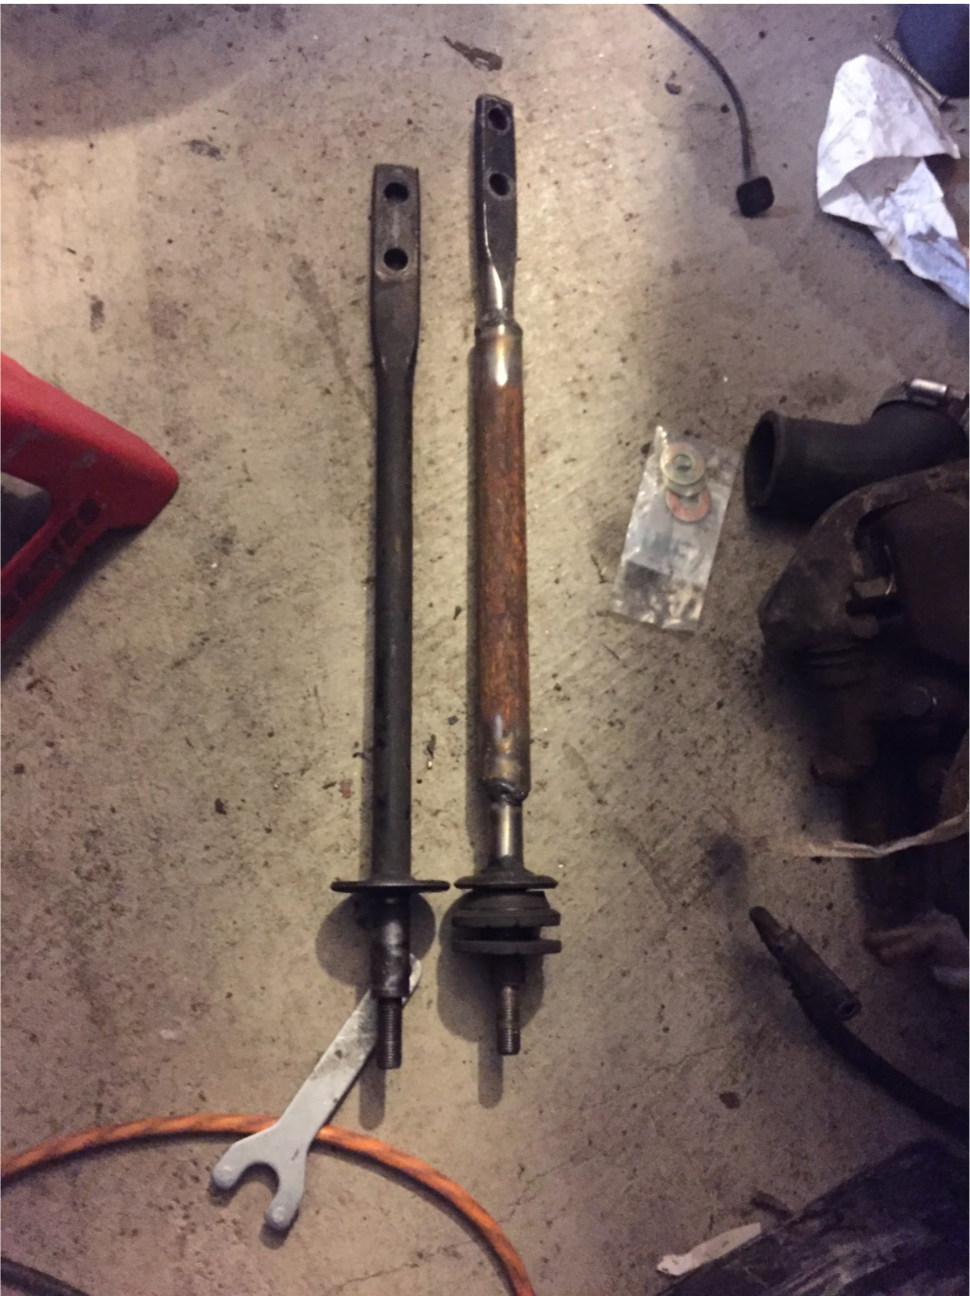
Here is the difference. Top is stock, bottom is extended.

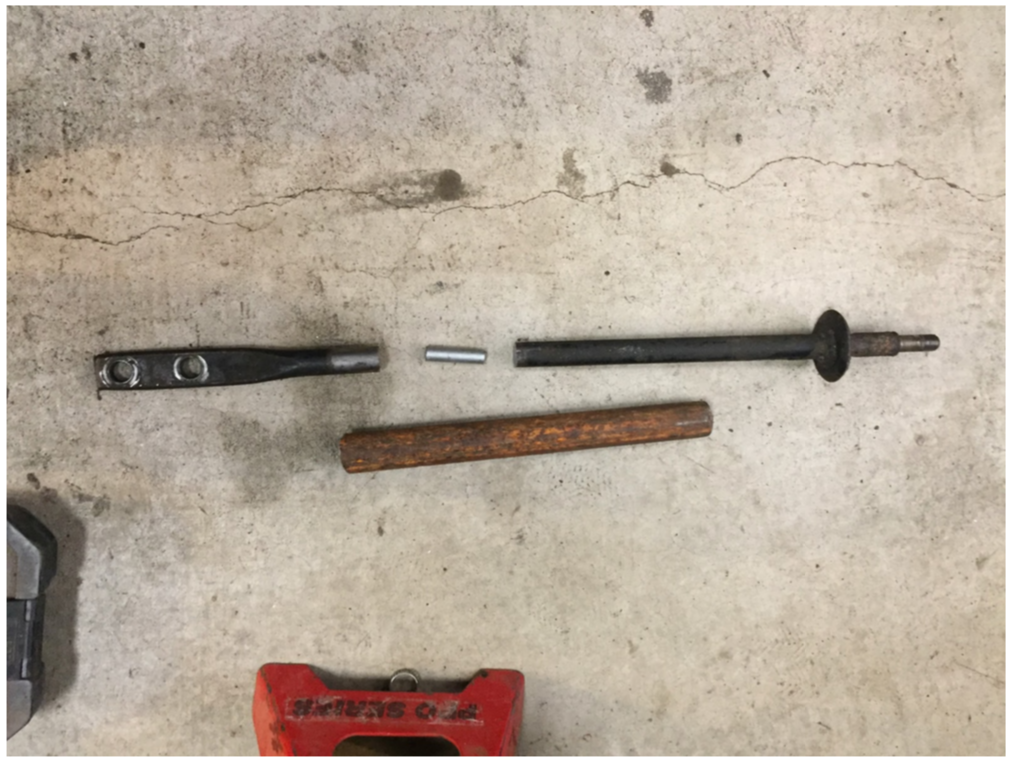
First cut the radius rod in half. I used some scrap steel rod cut at 1.5” to ensure that both radius rods were extended an equal distance. Find tubing that fits perfectly over the radius rods (it was a weird size). Cut the tubing so it covers most of the radius rod when extended.

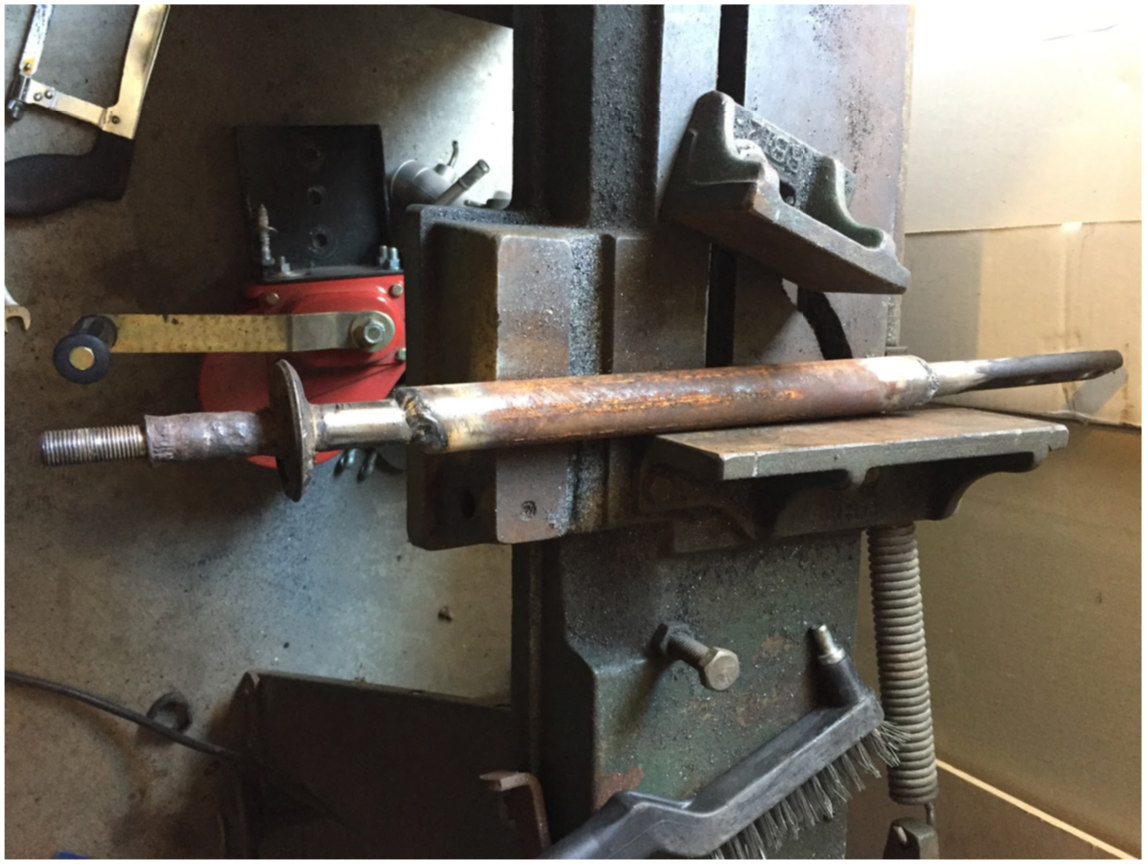
Then weld it all up. This was welded with a fluxed core welder. Remember to have clean surfaces to weld to.

Difference between stock and extended.

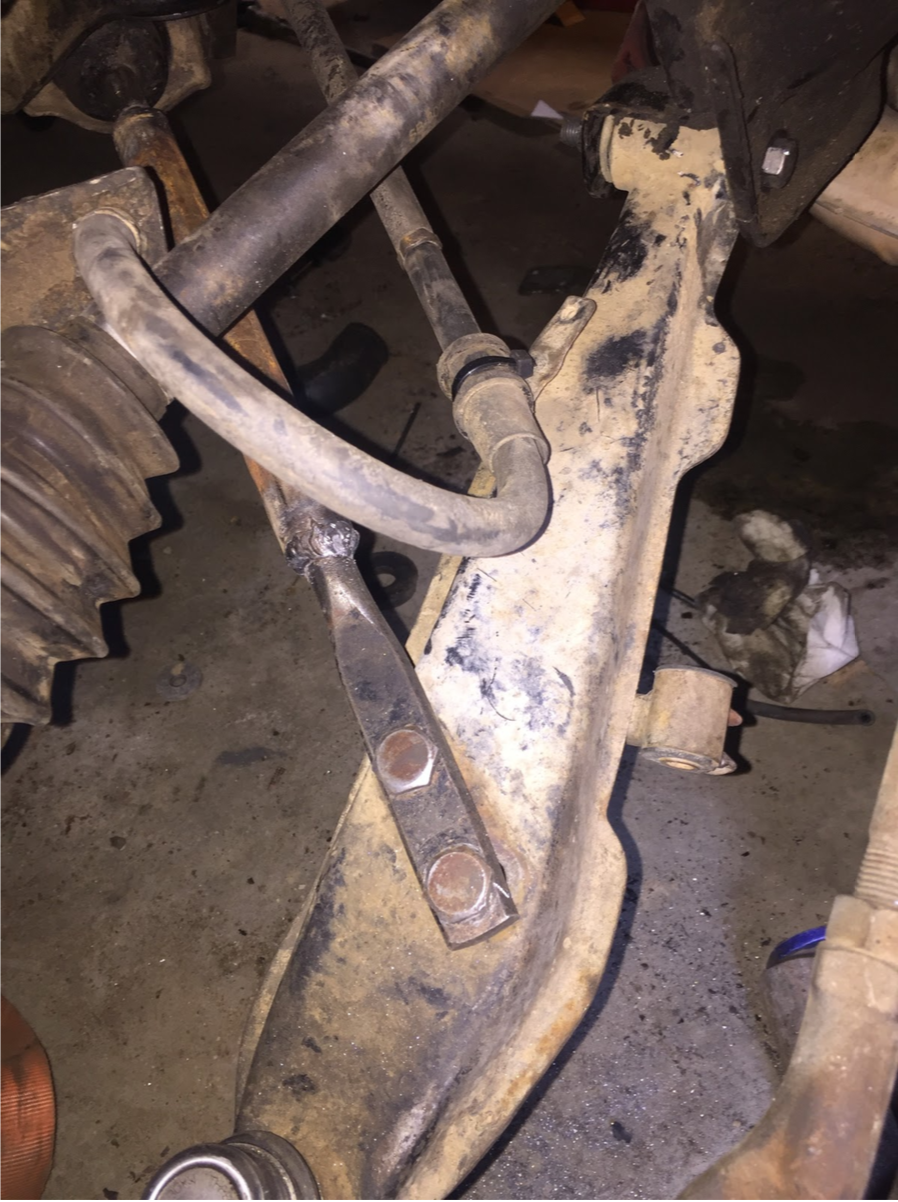
Installation was tricky. I had to ratchet strap the control arms forward so I could fit one bolt into the arms. You also have to elongate one hole on each side of the control arms for it to fully bolt down. This next picture you can see how the bolt hole to the right was elongated.

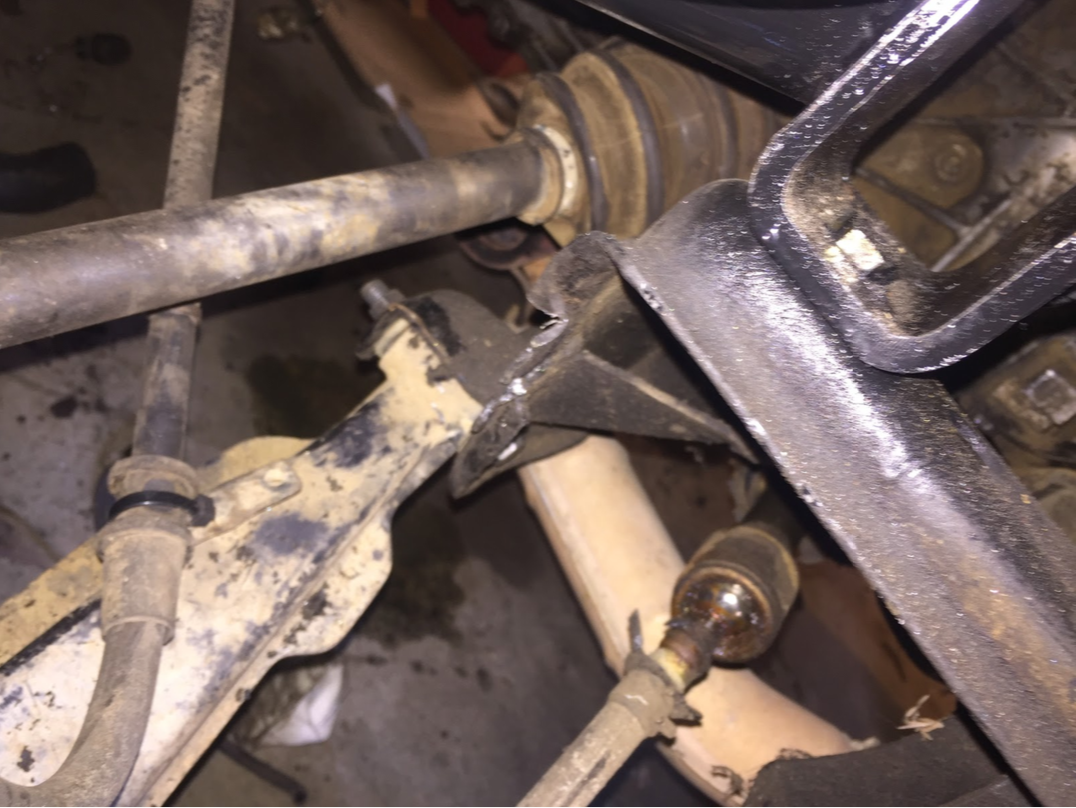
There were some clearancing issues with the axles with it hitting the crossmember at full lock. The engine crossmember had to be notched so the axles would clear. Look closely at the blurry picture to see where it got notched (Right above the control arm mount).

Interested in seeing Alex's ongoing work?

You can follow Alex on Instagram.

@buimfg

@stantheshitbox